Insert
Document Background Image
Set or delete the background image of document.
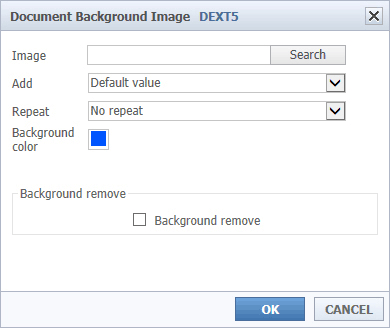
01you can select an image stored in the background in the browse button.
02You can set a scroll in the presence of the appended records.
03you can set the horizontal, vertical, horizontal and vertical repetition of a background image. In paragraph Repeat.
04You can set the background color by clicking on a different colored background.
05If you check the background removing section and click on the OK button to remove all background images and colors that were set.
Image
Add the external URL link image or user image
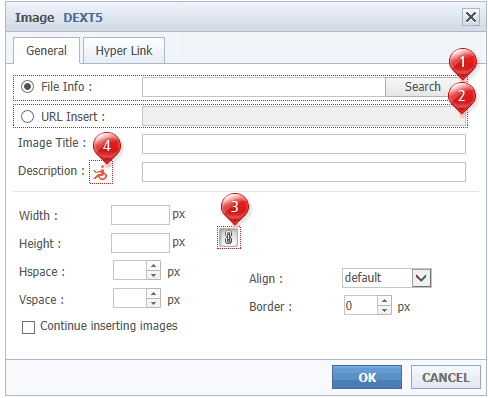
01You can select an image from browse button. (In this case, the area ② is disabled.)
02You can select an image to the URL address. (In this case, the area ① is disabled.)
03Enter the value of the other necessary image property. When you press the OK button, the image is inserted.
04Button no. ③ will appear when you edit an image.
When you click to active, The ratio of width and height of the image is maintained. But you don’t click to active, the ratio
05Clicking the images ④, Description of the web accessibility compliance is required when inserting a picture emerges.
Look at the contents, so that it does not violate the web accessibility, enter a description of the image.
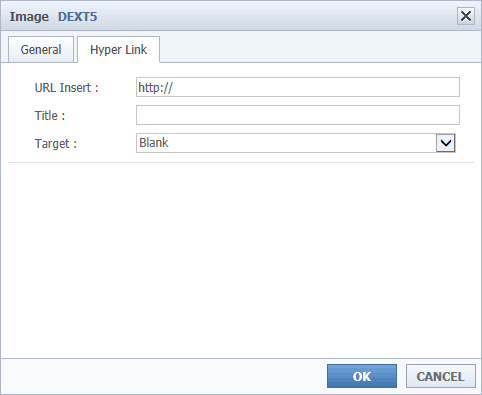
06If you have over a link to the image, enter URL or the other properties, and then click OK. (Required input: URL)
Entity > Share Media
Share your external video.
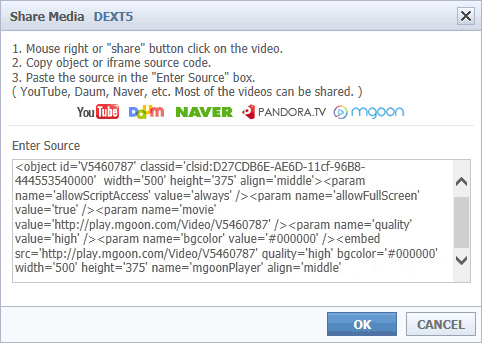
01Paste the video source to the source input field.
02When you click OK, the movie is inserted into an external editor.
03You can share your videos on YouTube, Daum, Naver, Pandora, Mgoon.
Entity > Iframe
Insert Iframe.
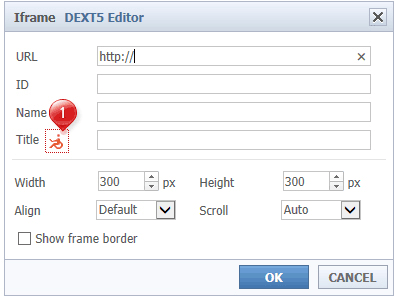
01Click the image ①, the content of the Web accessibility compliance is required when creating an iframe is displayed.
Look at the contents, so that it does not violate the web accessibility, enter the title.
02When you click OK after entering the required values of other properties is inserted IFRAME.
Entity > Flash
Insert Flash.
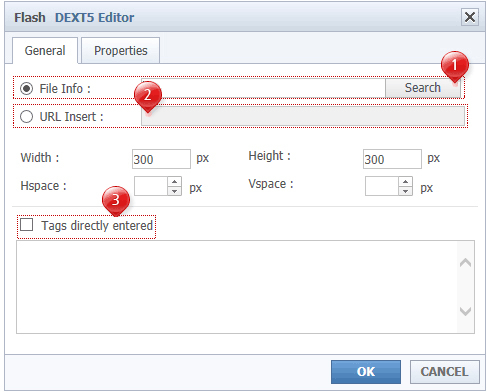
01Click to an index button and then add to user’s Flash file.
(In this case, the area ② is disabled.)
02Entering the URL can be inserted to the external flash file.
(In this case, the area ② is disabled.)
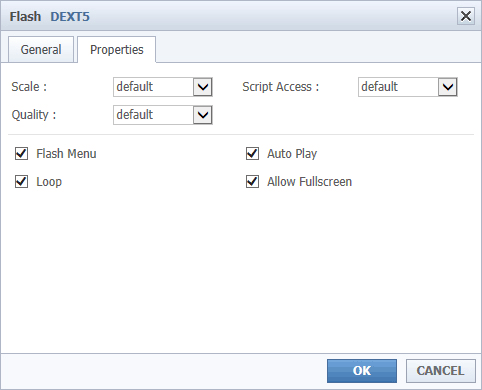
03Enter the required property values, when you click on the confirmation button, flash is inserted.
04If you choose to enter tags directly in ③, the property value of a pop-up window is ignored.
The flash manually enter the tag is inserted.
Entity > Media
Insert the video.
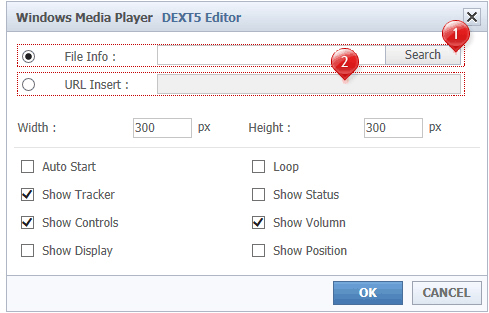
01Click the Browse button to add video files.
(In this case, ② time zones are disabled.)
02You can insert an external video file via the URL input
(In this case, the area ① is disabled.)
03After you enter the other required property values, click the OK button.
And then this video is inserted.
File Insert
Insert a file.
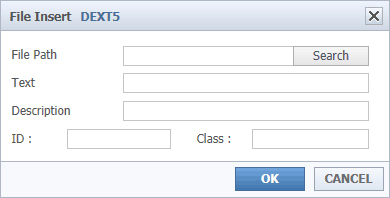
01to add the user's files, click Browse.
(If you put a file to display the file name appears in the text.)
02If necessary, enter a description of the file.
(Place your mouse over the built-in contents, you will see the file description).
03Add the id and class values in the file.
Hyperlink
By creating a hyperlink that allows the user to easily move the web page.
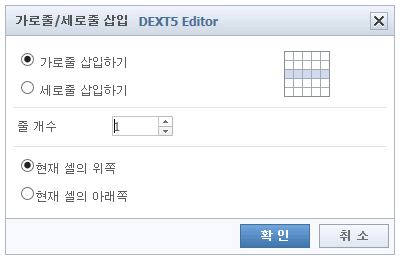
01Click on the select box ① and Decide the target to link of URL , the image and bookmarks.
02If you click on the picture ② again, in Web Content Accessibility appear on the hyperlink.
Look at the contents, and create a text to be displayed in a way that does not violate the accessibility from the web.
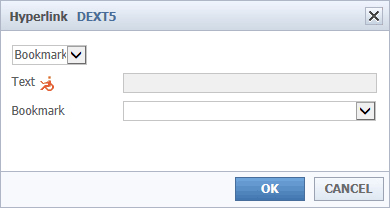
03If you select a bookmark in ①, bookmark made with editor is displayed in the name selection box of the bookmark.
And it may be selected one of them.
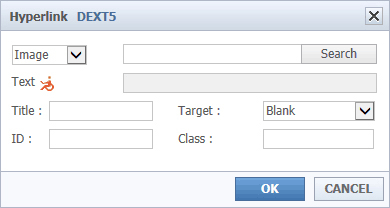
04When you select an image from ①, select the target you want to link to browse.
Bookmark
Insert a bookmark in the editor.
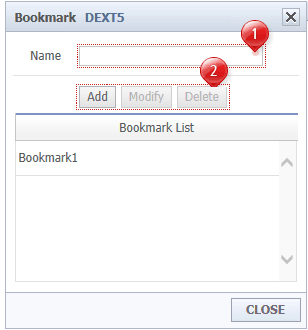
01You will see a list of the bookmark you inserted to date in the area ③.
02Write the name of the bookmark you want to add in the area ①.
When you press ② additional button, bookmark is added.
03Select one of the bookmarks that have been added to the area ③.
If that happens, further enabled button of the area ②, So you can do modify or delete.
Horizon Properties
Insert a horizon in the editor.
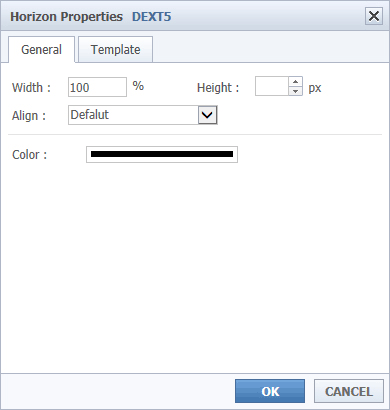
01After writing attribution of a pop-up window and click Ok, Insert a horizon in the editor.
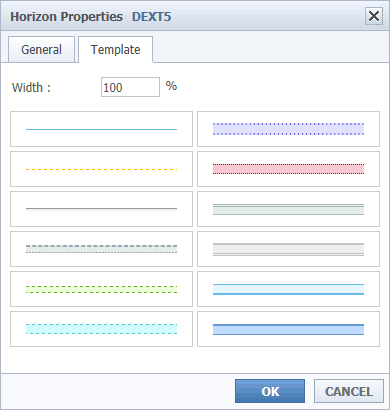
02Clicking on the pop-top can select a template in one of the many templates horizon.
Symbol
Insert a special symbol in the editor.
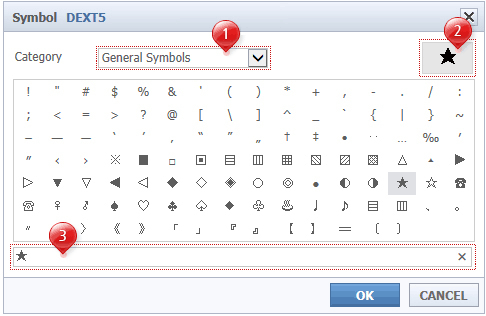
01Select the type of the special symbol in the selection box ①.
02When you move the mouse over the special symbol, that seems largely in ② zones.
03Click on special characters, the letter is added to ③. Pressing the OK button is inserted into the editor.
Emoticon
Insert emoticons editor.
![]()
01When you click on an emoticon, It is inserted into the editor from the pop-up window.